
Installing Cups on Raspberry pi for HP printer
With a raspberry pi it is super easy to use a printer and shared it across your home network. This way, all your family members are able to print documents from their own device. Other advantage is that the printer can be stacked on a central place, or a maybe a less visible place. The device from where your pages are printed does not neccessarily have to be attached with a cable to the printer.
Personally, I have a HP Deskjet 2620 all-in-one printer. This is a cheap device, but does the job for me. I don’t use the scanner. I only want to print some pages now and then.
To setup this printer for the raspberry pi (all versions will do. I have a raspberry pi model B setup) you first must download the latest raspbian software. A good introduction about the raspberry pi and Raspbian can be found here.
- Download Raspbian: https://www.raspberrypi.org/downloads/
- Install Raspbian on the raspberry pi
- Configure Raspberry pi and install Cupsand HPLIP
- Add printer to CUPS
- Add printer to Windows 10
Configure Raspberry pi and install Cups and HPLIP
login to raspberry pi (at first boot user: pi, password: raspberry
- configure the raspberry pi:
- sudo raspi-config
- goto 2. Network options and the change the host name
- goto 5. Interfacing Options and enabel ssh (important!, otherwise you can’t connect to the raspbery pi terminal from the network
- goto 4 Localisation Options and set the correct timezone and culture settings
- goto 7. Advanced options and choose A1 Expand Filesystem.
- After this select
. Now you must reboot the raspberry pi. - Update the raspberry pi
sudo apt-get update && sudo apt-get full-upgrade -y- Install cups and hplip
- sudo apt-get install hplip cups
- sudo usermod -a -G lpadmin pi
- sudo nano /etc/cups/cupsd.conf
- sudo nano /etc/init.d/cups restart
Inside the file, look for this section:
Only listen for connections from the local machine
Listen localhost:631
Comment out the “Listen localhost:631” line and replace it with the following:
Only listen for connections from the local machine
Listen localhost:631
Port 631
This instructs CUPS to listen for any contact on any networking interface as long as it is directed at port 631.
Scroll further down in the config file until you see the “location” sections. In the block below, we’ve bolded the lines you need to add to the config:
< Location / >
# Restrict access to the server...
Order allow,deny
Allow @local
< /Location >

< Location /admin >
# Restrict access to the admin pages...
Order allow,deny
Allow @local
< /Location >

< Location /admin/conf >
AuthType Default
Require user @SYSTEM

# Restrict access to the configuration files...
Order allow,deny
Allow @local
< /Location >
all lines Allow @local must be added to the sections mentioned here
Restart cups
sudo /etc/init.d/cups restart
Adding the printer to cups
Now that CUPS is installed with HPLIP and cups is configured to accept some requests, it’s time to add the printer to CUPS in the CUPS user interface.
Open a browser and type the following url {{% badge color="orange" %}}https://<ip-address>:631/admin {{% /badge %}}
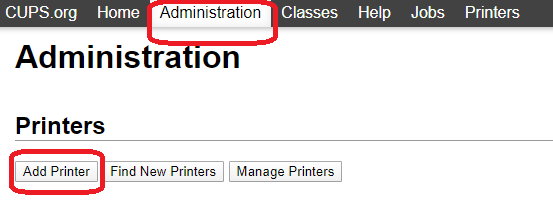
Click add printer
select the printer attached to the usb port and click next
fill in the next form
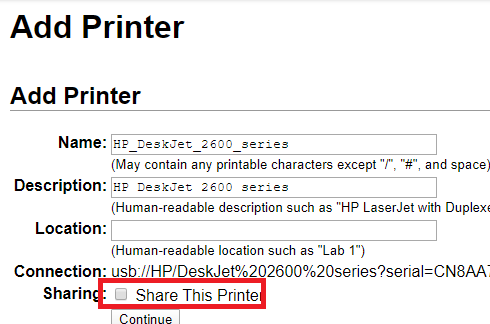
Finish setup for the selected printer and now you’re almost ready!
Setup windows 10
Go to Devices and Printers in the control panel (Control Panel\All Control Panel Items\Devices and Printers)
Add a printer. The printer is automatically detected and can be installed.